On The Job Training (OJT)
My passion lies with the designing and construction of homes and other buildings. Over several summers and also through my high school Life Skills classes, I have had multiple opportunities to work as a log home apprentice, construction worker, and also a personal assistant for a home designer on a job site.
The following home is one that I was involved with from beginning to end — or “Dirt to Done” as the contractors say — during my Junior and Senior years in High School. A few of my own original ideas even show up in this unique log home that was built just outside of Yellowstone National Park.
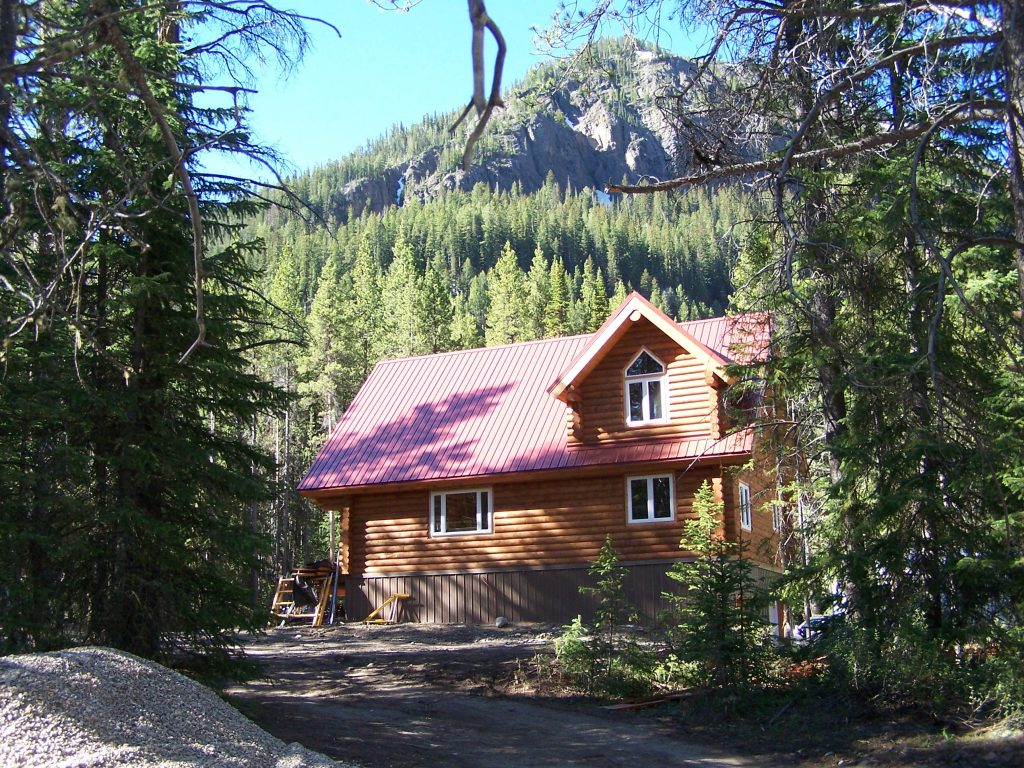
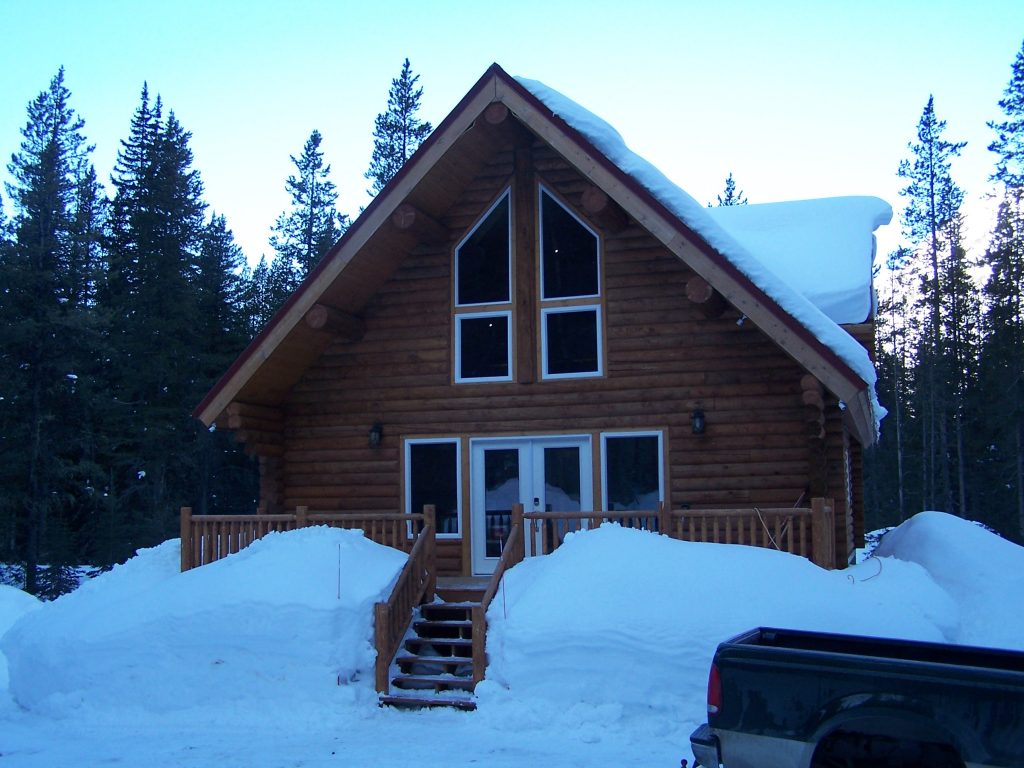
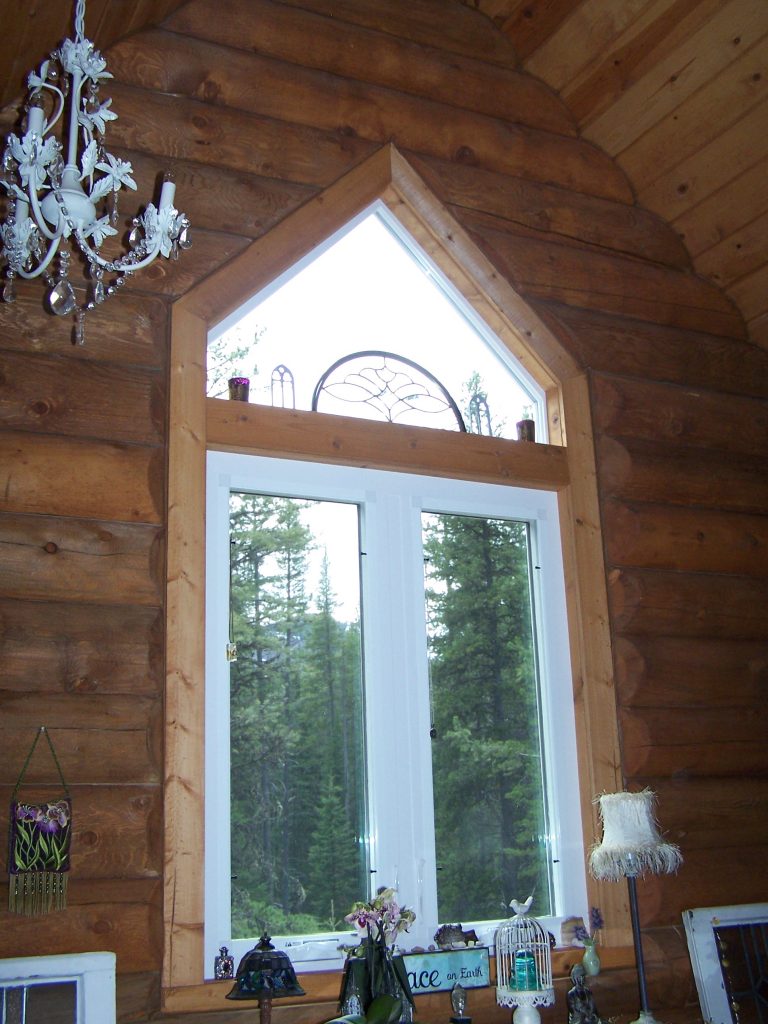
The following is a photo essay of this custom log home over the two years of construction. One of the design features I advocated for was the small trapezoid windows over the gable dormer windows. A touch of class!
Foundation Work
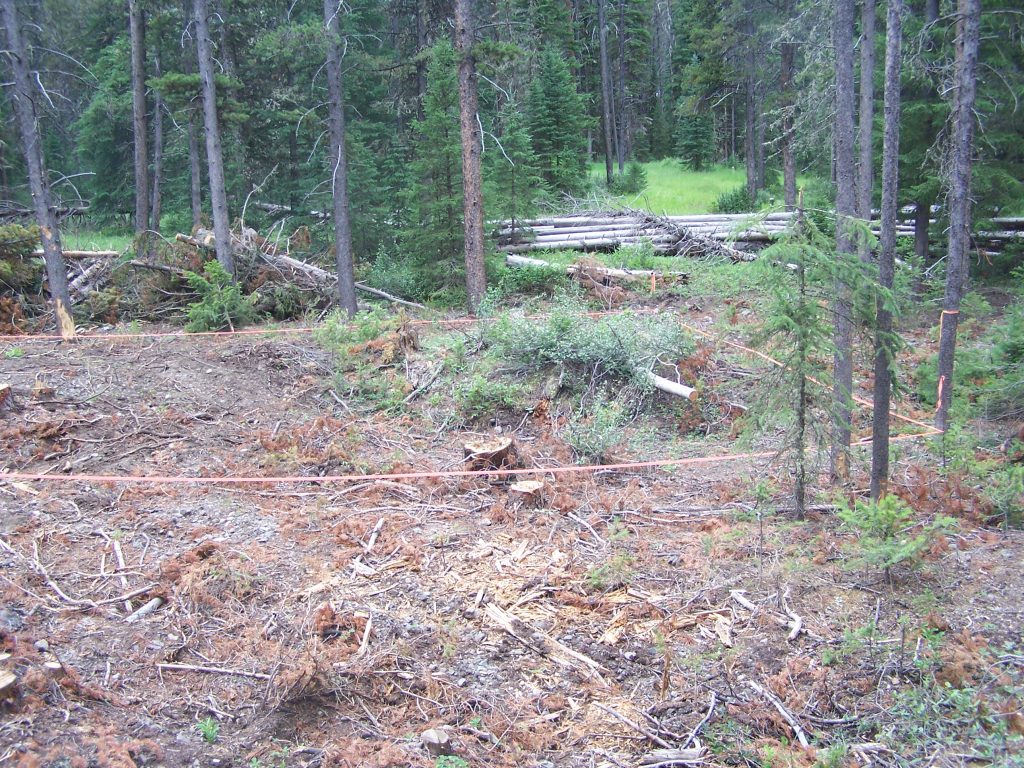
The first stage was clearing the site and marking out the foundation general location. My job in this stage was to help use a laser transit across the site and measure out the footprint of this new home.
The next step was to dig the footers and pour the cement for the footers. I had the non-glamorous job of helping to set the rebar into place and level off the cement on the top of the forms.

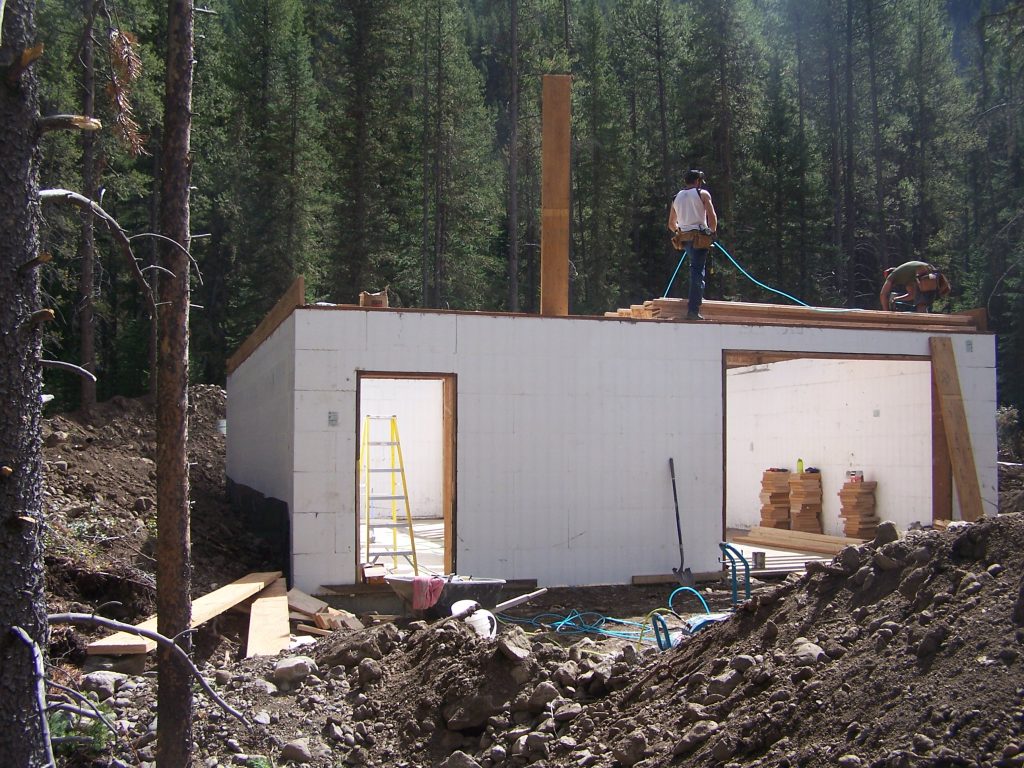
After the footers cured this home stacked ICF (insulated concrete form) blocks were installed for this foundation. The next steps were to pour the cement forms full, allow the cement to cure, install the interior framing for the basement rooms, and add the first floor sub-floor framing. (I’m the one holding the air hose.)
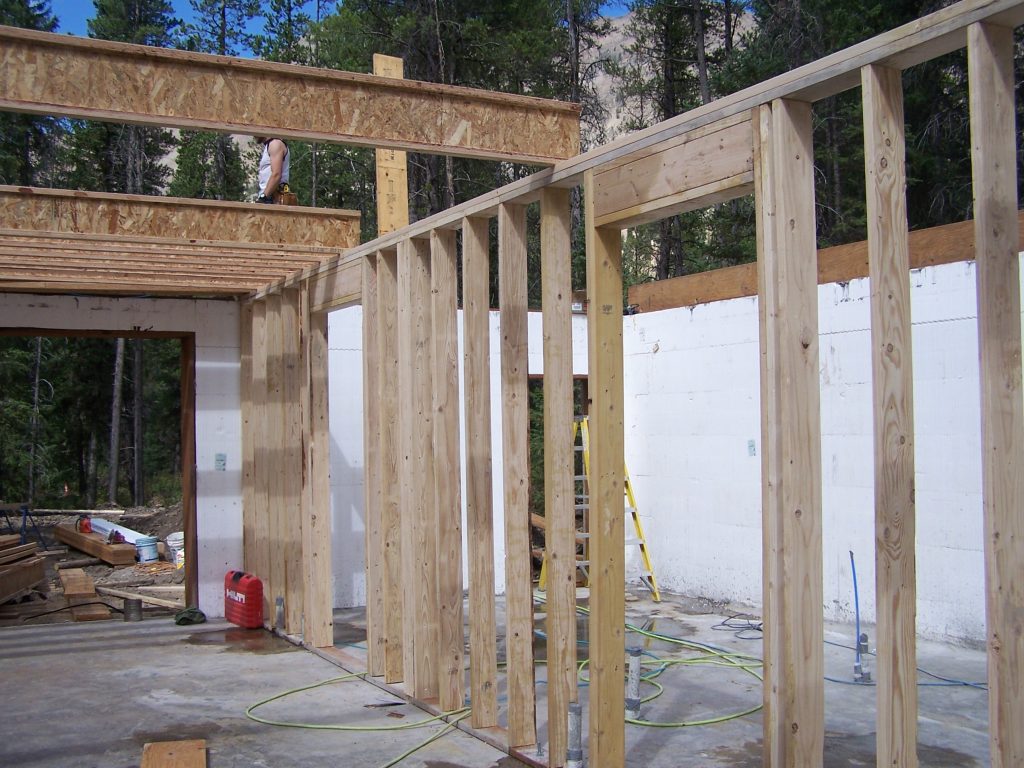
Here the basement interior framing can be seen. Learning how to evenly space studs and install the headers over interior doorways was interesting.
The I-joists for the first floor sub floor and blocking have been set into place. My biggest thought during this process now MANY of those floor joists we had to haul up onto the sub-floor and install!
I also learned from the general contractor that placing blocking between the joists at certain intervals is not necessary structurally, but it is a good way to prevent the floor from having any squeaks or bounce!
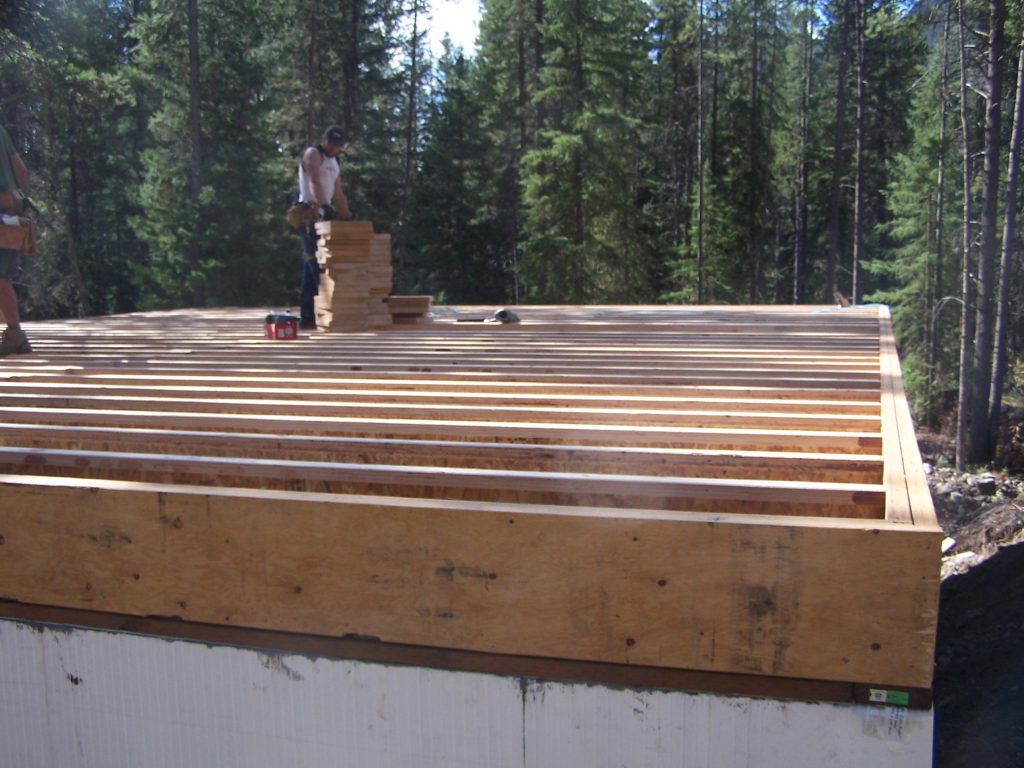
After the I-joists came the first floor sub-floor of 3/4″ plywood. This plywood was also a waterproof product. This job site was at 7,400 feet elevation, located deep in the mountains, and rain was an almost daily occurrence! The waterproof property of the plywood kept it from warping when it was exposed to a lot of water.

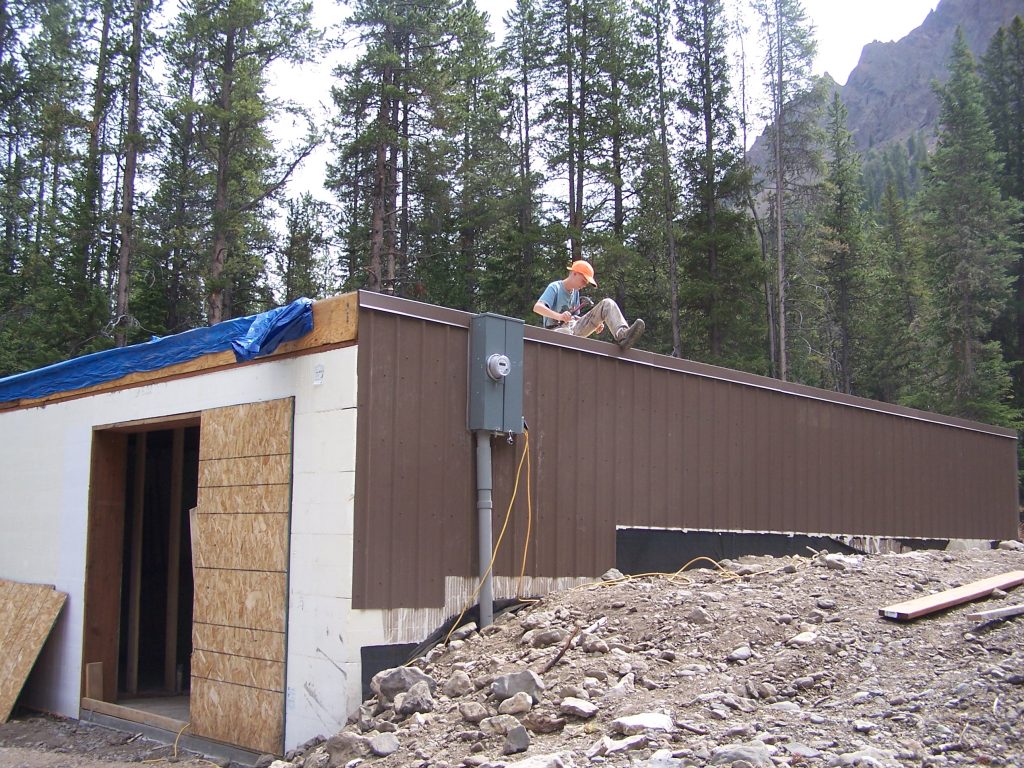
Here I am, up on the sub-floor, as we were installing the brown TuffRib metal siding on the exterior of the foundation. Through research for this customer I discovered that this brown siding was a fraction of the cost of even faux-stone siding.
Log Work
Once the mundane task of excavation, foundation, and sub-floor was completed, the fun part of stacking logs began. When the log truck arrived the first thought that I had was to sort the log into various lengths.
If you look closely you can see different traits in each of the stacks of logs. The round logs were for floor joists, support posts, and roof members. The smaller diameter logs with the half-moon pattern cut into the bottom were the wall logs. This home utilized a Swedish Cope stack. The wall logs were a 9″ diameter.

With in a few weeks the stacked log walls began to take shape. I helped stack logs, interlock the saddle notched corners, and drill the 5/8″ x 12″ lag bolts into the log walls with a 1/2 drill. The logs were pre-cut so that the logs ended where the window and door openings were located. Notice there are no log ends protruding out into the window openings.

Here a round log floor joist was set up on the scaffold to be cut to length. The builder explained to me that wall logs arrive cut to length for the home but the roof logs had their final measurement and cutting on site. I also learned that the builder used 2×4’s placed vertically on the walls as guides to help to keep the log wall straight and true. The blueprints for this home were in green canister on the table to the left. I loved the time I spent pouring over the designs with the general contractor/builder.

The log floor joists for the second floor were the next part of this giant “Lincoln log” set. I helped to use the chainsaw to cut the copes into each of the floor joists to fit each one over the main girder beam.

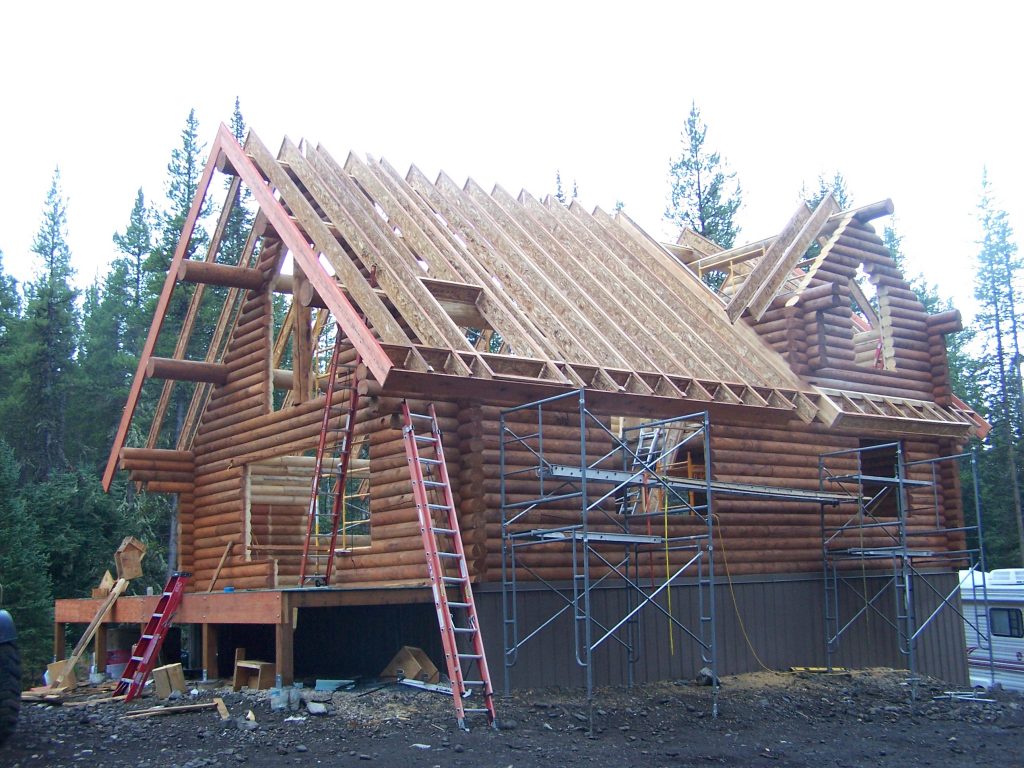
After the log walls were stacked and log joists installed, the roof system began to take shape. My clearest memory of this stage is that heights is NOT my thing! The log ridge beam overhead has the first I-joists being set into place for rafters.
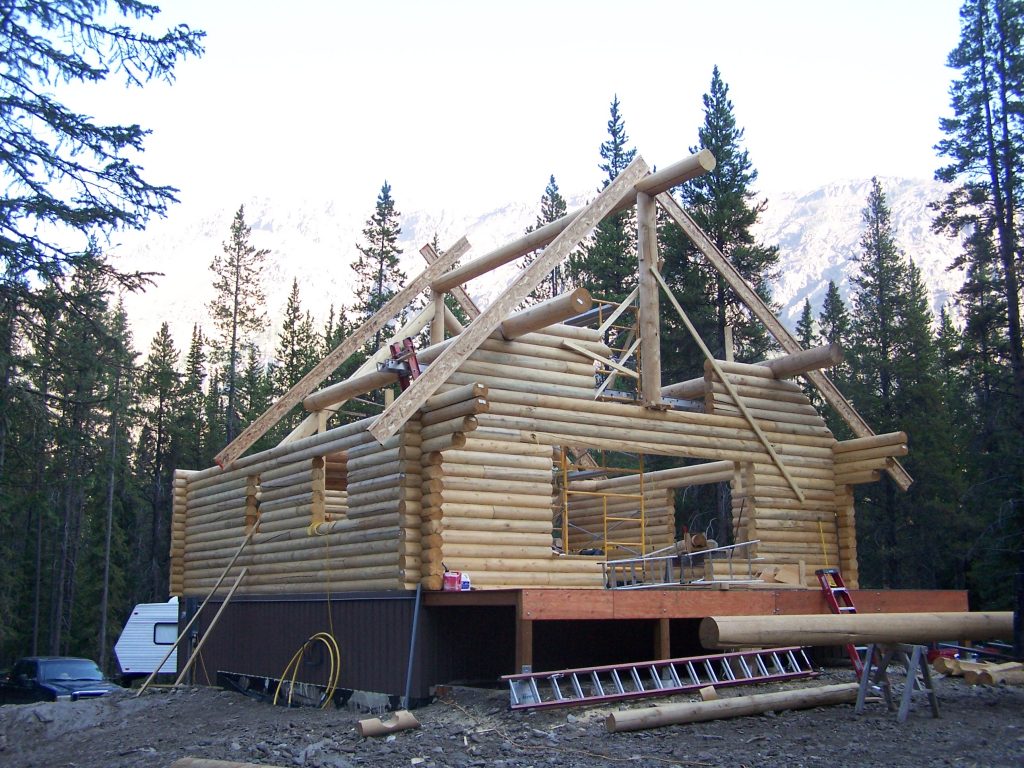
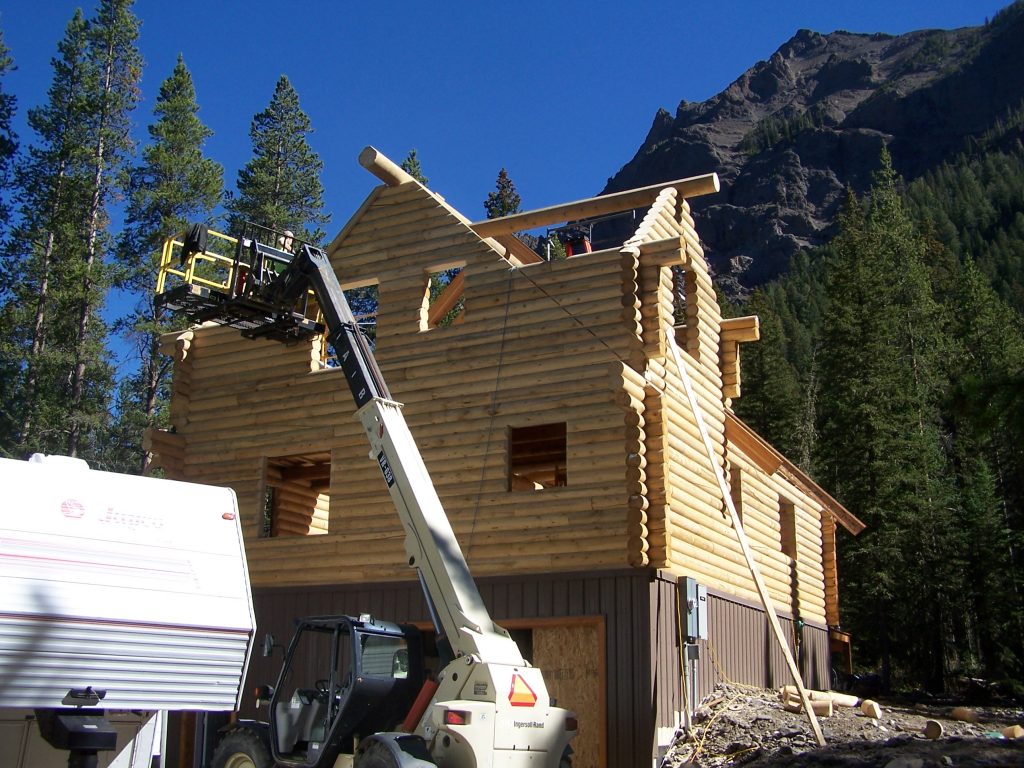
As the logs climb higher it becomes visible that the gable dormers and the gable ends of this home are also stacked logs. I discovered that this was a more unusual way to build a log home and more difficult, but it was what the customers wanted. The builder finally got me up higher! That’s me in the sky-lift bucket.
After the logs were stacked, the log home staining began. The exterior staining was done at this point, before the exterior doors and windows were installed so that the over spray and drips would not damage them. I learned that oil based log home stain lasts very well, smells terrible, and is even worse to scrub off — or wear off!

As the days progressed the rest of the log roof system was set into place and the rest of the I-joist rafters were anchored down. My job here was mainly to hand up the joists and cut and attach the fascia boards on the ends of the roof joists.
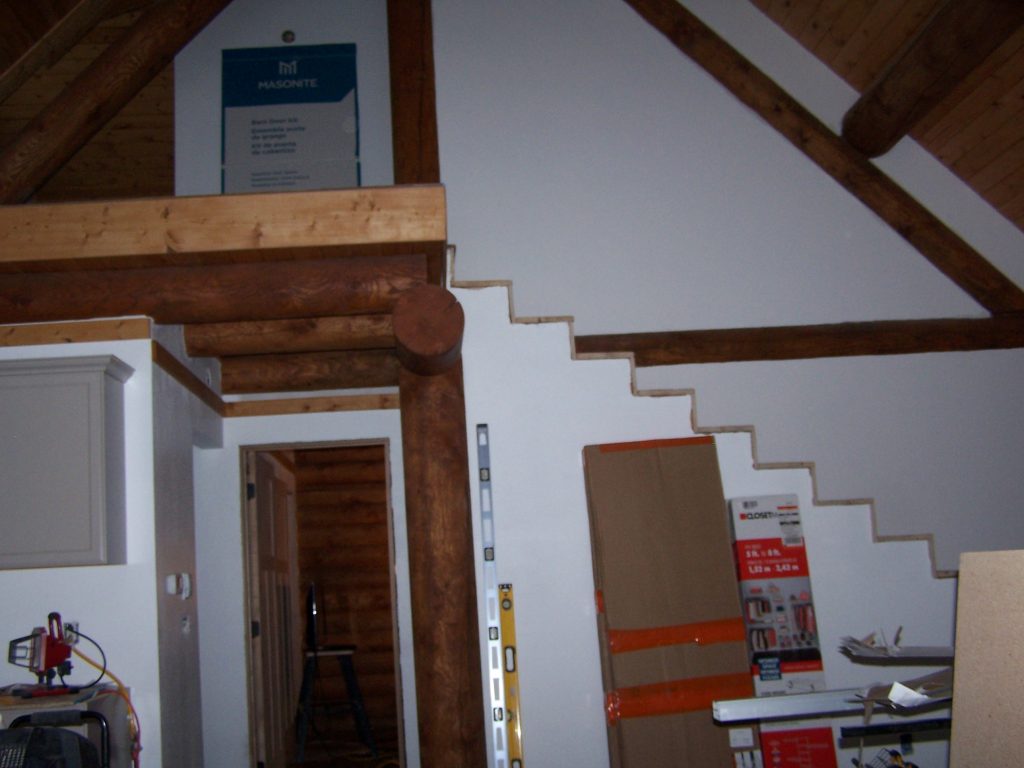
As the last of summer wore away and the fall began to set in, the first snowfall came. The roof sheeting was installed, the Titanium roof under layment began to be laid, and the windows were installed. Here one of my gable trapezoid windows became reality. I also learned how to stall windows into the log home with special shrinkage channels and slip joints which are unique to only log home construction.

This photo details the inside of the windows. If you look closely, you can see a small gap above the window frame. This is the shrinkage gap I learned about. The log walls ‘move’- expand and contract- as the weather and humidity changes. A window is ‘fixed’ – it does not move. So, through the slip slip channel (not visible) on the inside of each window opening and the shrinkage channel above the windows are not damaged as the home adjusts to the outside temperate changes. The builder told me that no matter how old the logs are they will always expand and contract some in response to humidity and temperature changes due to their thermal mass. Amazing!

After the bulk of the log work was done, the main task became making the log home weather tight before the cold weather came in earnest. The soffits (under the edge of the roof) had to be installed. Also, the fascia boards (along the roof edge) were completed. The contractor hired a metal roofing subcontractor to install the red metal roofing. My job was staining the soffit and fascia boards before installation, helping to measure and precision cut the soffit and fascia boards, and affix them to the house.
Interior Framing
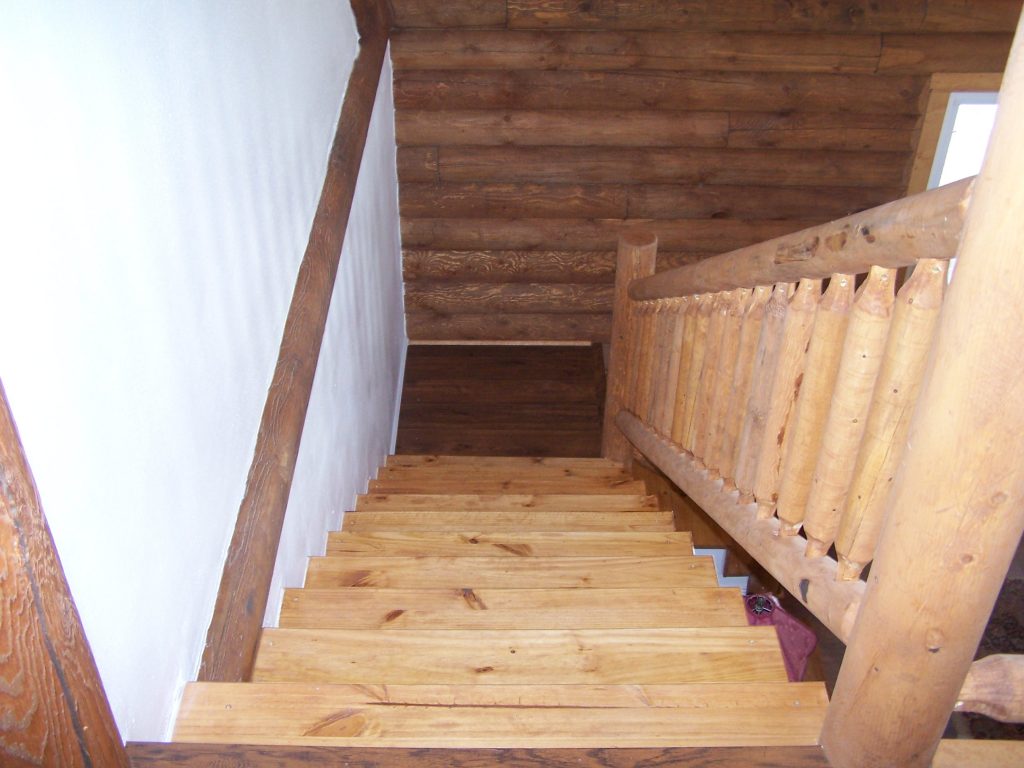
While staircases may seem like a small thing, I discovered they are a major luxury when I had to climb a ladder to get to each level of this house! The general contractor and I spent a few days building the two staircases for this home. I never realized how challenging it was to build stairs!

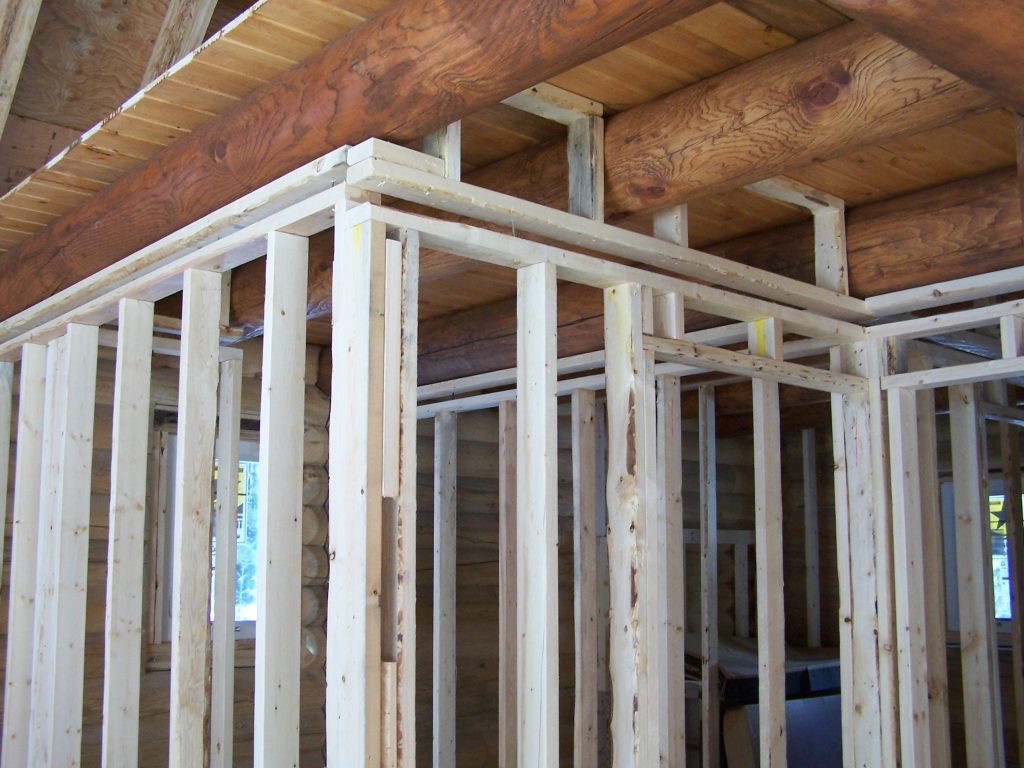
Along with the staircase, the interior framing for the walls was installed.

Here I learned yet another secret to log home construction. The interior walls are installed with slip joints and shrinkage channels, just as I explained above with the windows. Without this specialized construction the drywall on the walls will eventually buckle and crack some as the log move. To cover the shrinkage channel, trim will be attached to the top of the wall only and the gap will be concealed while still being able to move undetected. Wow! I’ve never read about this in a log home magazine.
Here I am helping to frame the basement.
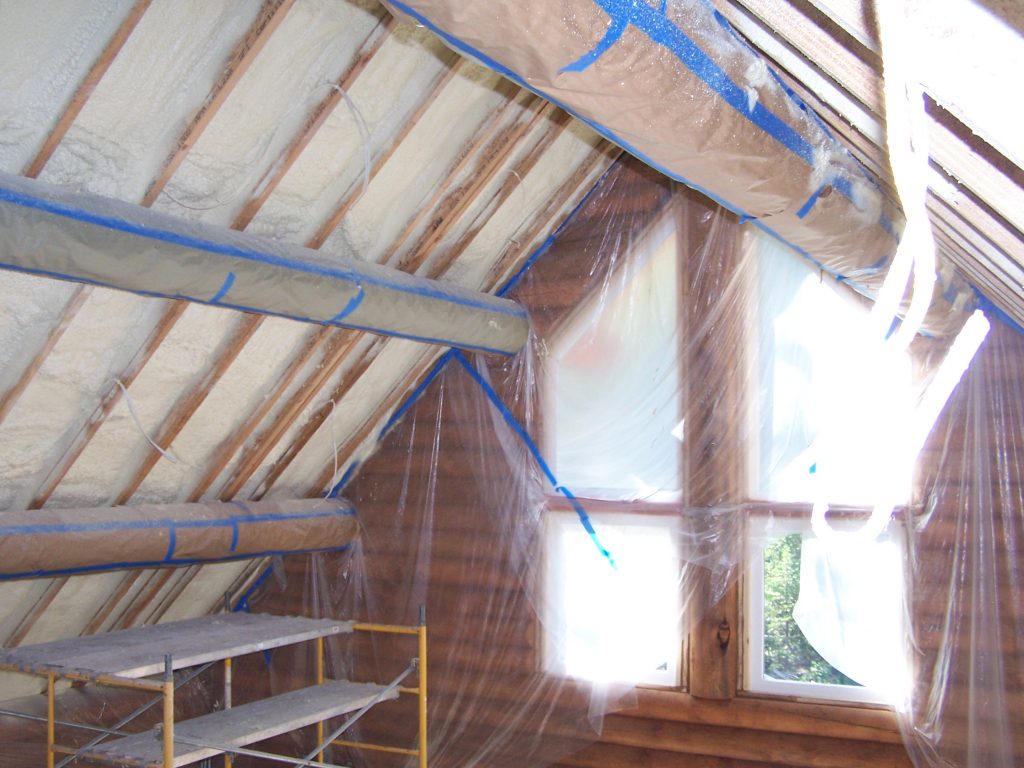
To help to seal this home against any air leakage and to also get the best insulation possible, spray foam was installed. All of the log work, doors, and windows had to be masked off before the spray foam contractors came and applied their product. Masking off was one of my many jobs. We discovered that blue tape does not like to stick to pre-stained log wall. After several tries, I found the Gorilla Tape was about the only thing that held the paper and plastic in place.
Interior Finishing
Once the spray foaming was concluded, the installation of the drywall, taping, texturing, and painting were the next steps. Here we see the drywall installed and painted. Also, of note in this home was the interior trim along the tops of the walls on the first level. Log home science in action! Installing trim and painting were my main tasks.
The 1×6 Pine Tongue and Groove was also installed on the home at this time. As we placed each piece of T&G we had to be careful to pull the wiring through for the electric. Cutouts also had to be made for the many can lights. The interior window and door trim was also installed at this point as can be seen visible around the edge of the trapezoid windows in the gable.

I am sorry to say that I don’t have any good photos of the engineered flooring that we installed throughout this home. Here we see the loft floor, dust covered though it may be. I found this type of flooring to be easy to install and not time-consuming.
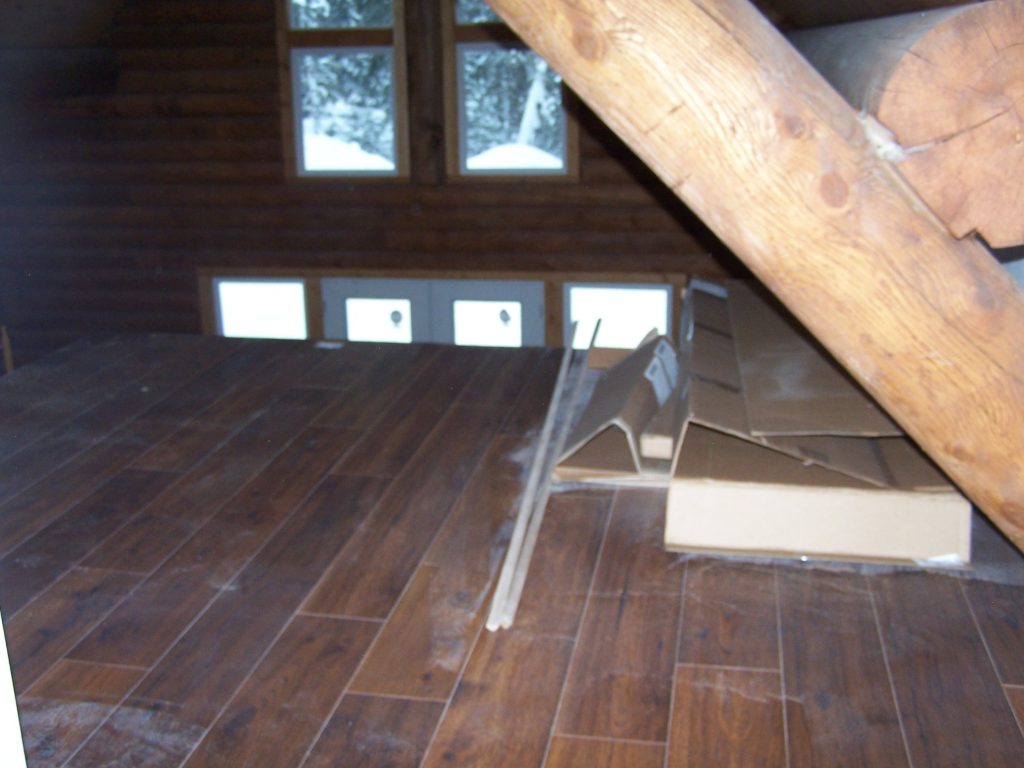
Here is a better shot of the floor in the great room. After the floor was laid, we carefully covered it with large sheets of cardboard to prevent any damage to the floor from the on-going construction.

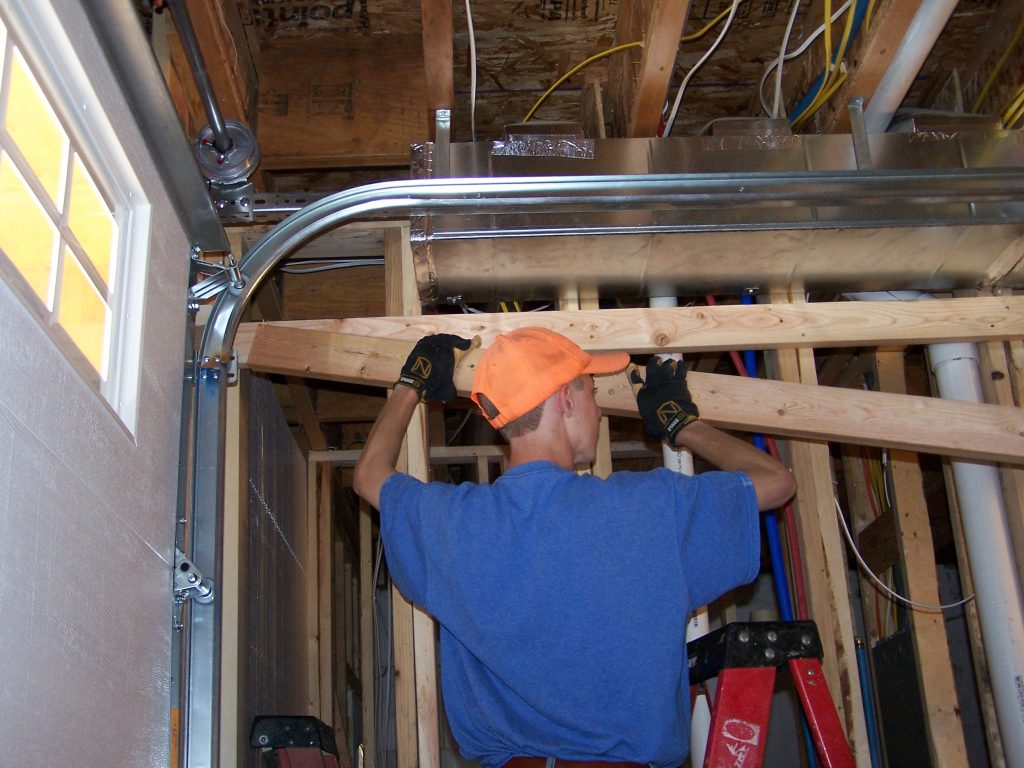
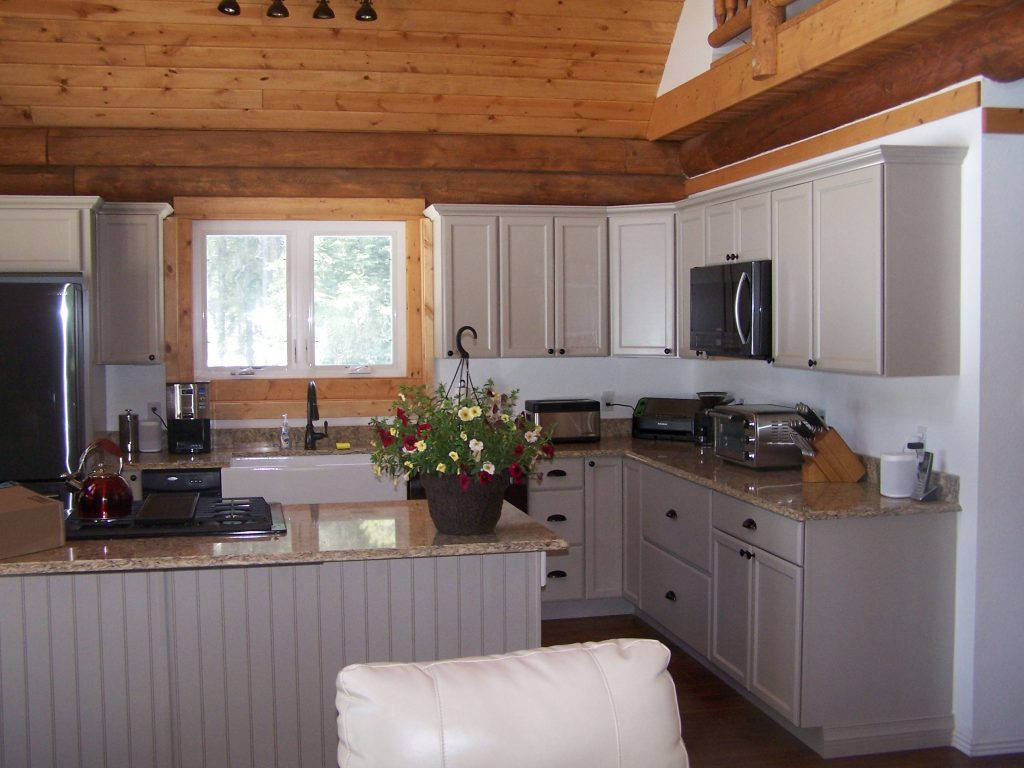
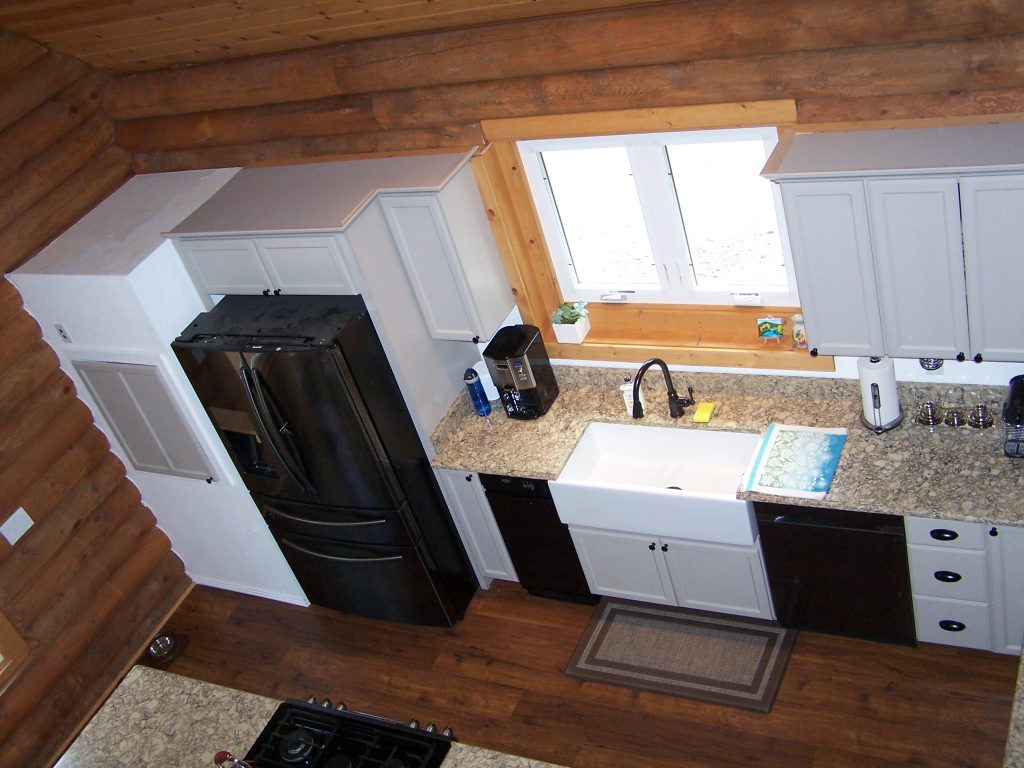
The next stage was to install the kitchen cabinets. Snow can be see falling though the window. The owners chose hard maple cabinets with a painted finish. These were lovely cabinets, very sturdy, and HEAVY! My job was to help measure out where the cabinets went and hold the cabinets into place as they were screwed down.

We backed the appliances into their slots as well.

Installing the log railing on one side of the log staircase and the loft edge were another one of many tasks that we performed. Staining the last few balusters was not much fun.

As the construction continued, the next matter was the installation of the interior doors. These were solid Alder doors. One neat feature visible here was the inclusion of a sliding barn door into the master bedroom closet. It was interesting to learn how to install both types.

We were very glad to be working inside when the weather outside was -25 degrees at times and the snow piled high outside. The general contractor showed me how the blueprints for this home bear a structural engineer’s stamp and the snow load was estimated at 140 pounds. That is a lot of snow! One of my less attractive jobs — but necessary — was daily snow removal at the entry doors and porch. A snowplow came every few days to clear away the record snowfall we experienced that winter.
Snow flurries and icicles were a daily routine. During a break in the weather, we installed the log railing and staircase.
The master bedroom closet had closet maids installed. This was a relatively easy job, so long as I kept the level handy and was careful to locate each shelf and rod where the lady-of-the-house desired it to be set.

Completion of Log Home
As the months marched passed, the home approached completion. The custom solid-surface counter top was installed.

The loft looked nice, set off with the soft can lights.

Another kitchen shot.
The timber staircase looked attractive with the freshly sanded and varnished stair treads. The general contractor made it abundantly clear to me that there were to be NO drips or runs on this staircase when I was finished.
One of my last contributions to this home was the custom wood tops that we placed on the top of all of the cabinets. With a log home that features a half loft, such as this, the unfinished tops of most cabinets look just that – unfinished. This was our solution.
Here is an inside shot of the trapezoid window above the standard casement window.
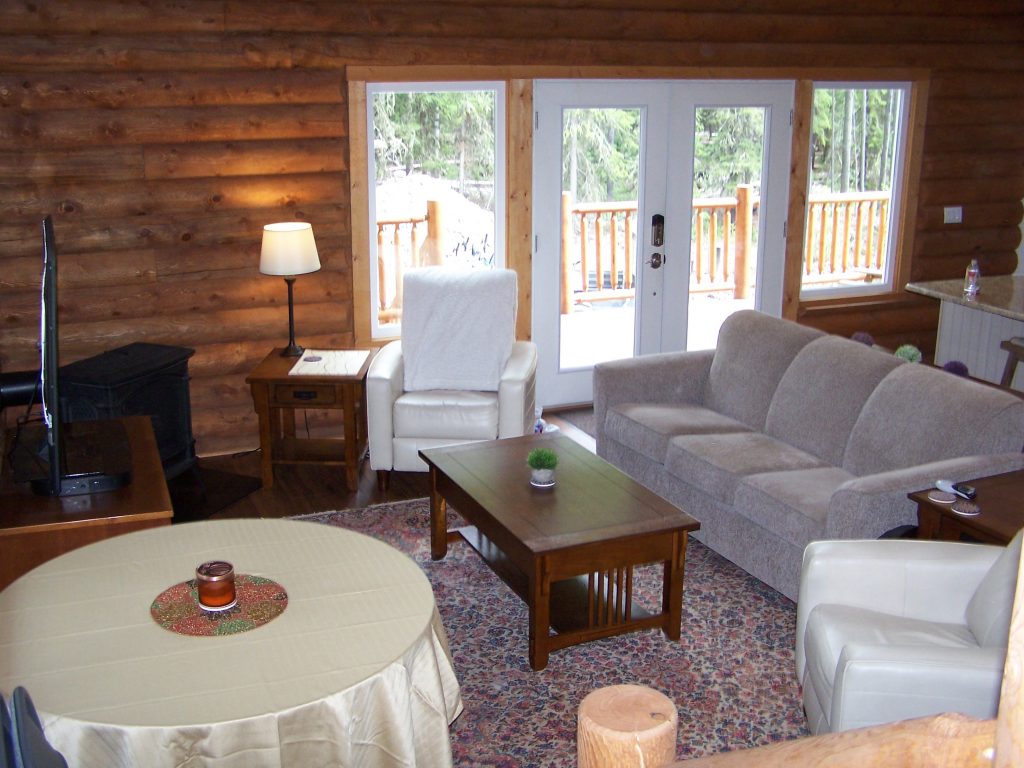
This is a view of the great room and the wide French door opening out onto the front deck.
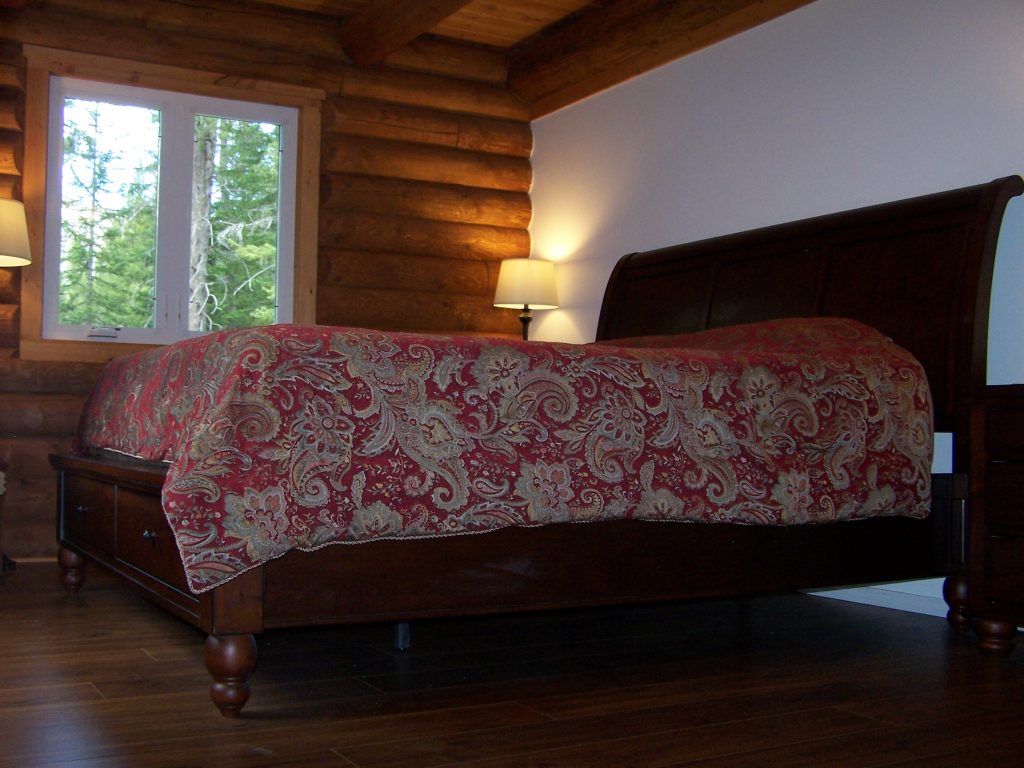
The Master Bedroom with a sleigh style bed is fitting for this house.
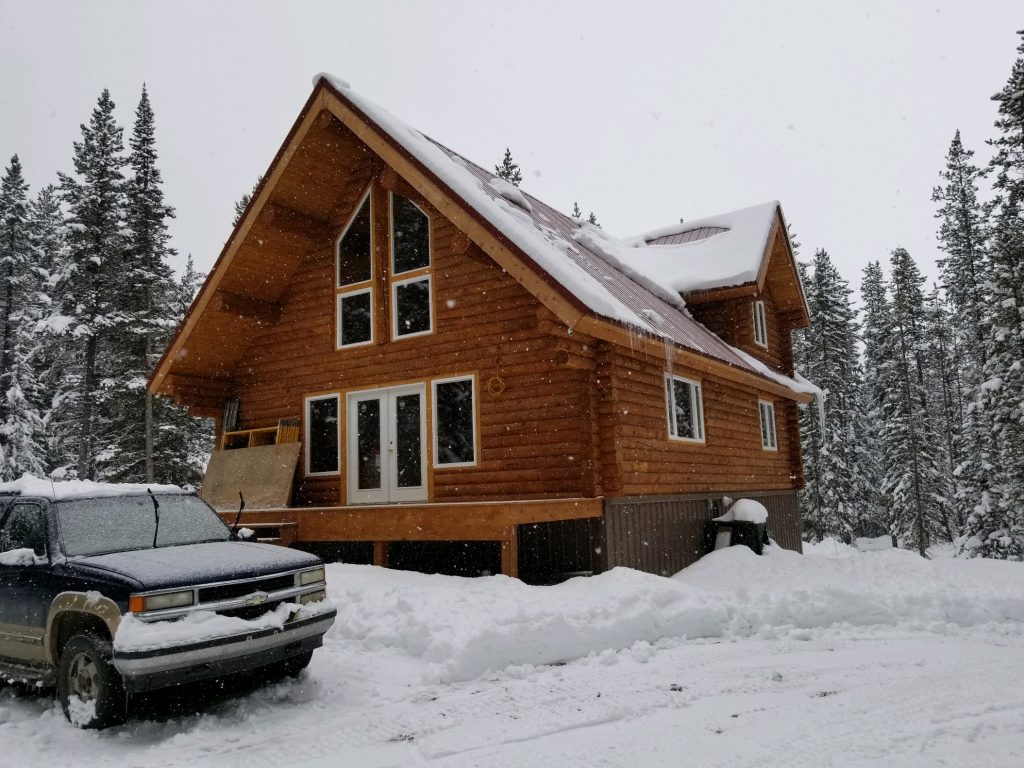
And here this finished log home stands proudly at the base of this huge peak. This 26 month long project was a grueling marathon, but also some of the most rewarding times of my life.